|
Howdy folks!
On this page you can learn how to, in just 3 easy steps,
draw a Bumble Bee Background just like a real expert, namely me.
To follow this tutorial you will only need:
1) A sheet of paper
2) A pencil (and a sharpener and an eraser)
3) An ink pen
4) Some colored pencils
I covered a lot of the material pertaining to preparation in my outstanding tutorial "How To Draw A Wackobilly!"
If you haven't been there you can go there
here.
If you have taken that astonishingly simple lesson, then you know that you are in for a real treat. Because, believe it or not this tutorial is even easier than that one!
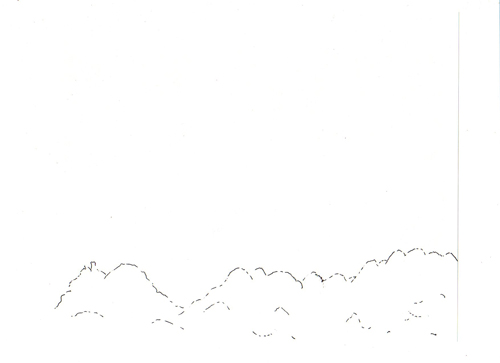
Step #1: Roughly Draw In Your Trees!
Here I have jumped right in using my trusty dippin' ink pen. I skipped using a pencil and that saved me one entire step!
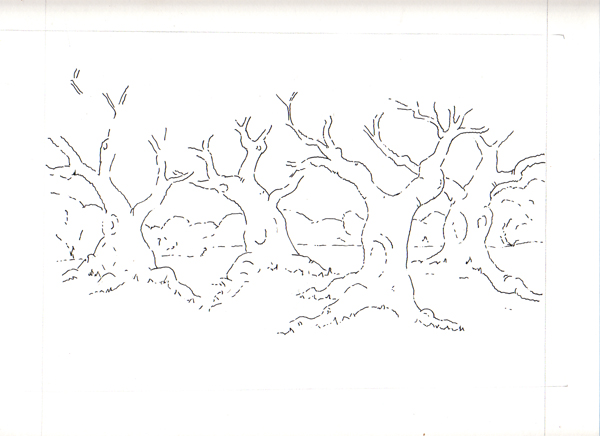
See? I went right to it; and so can you.
On a personal note, trees are great things to draw because I never have to bother with drawing a straight line. I have a hard time with straight lines. I just let that pen flow like how a tree grows.
(Note: Always draw your trees from the bottom up, not from the top down, why? That's the way they grow, isn't it, from the roots up?)
That was a piece of cake so let's hurry on to
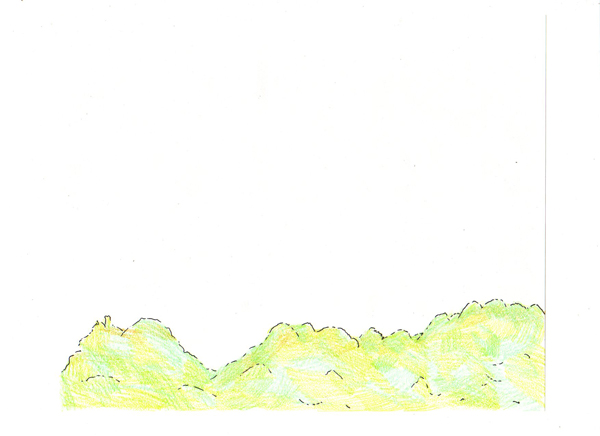
Step #2: Color In Your Trees With Your Colored Pencils!
Like this...
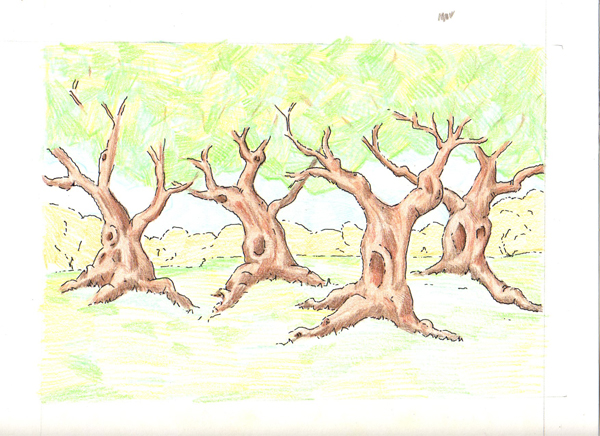
Start out light and easy and then keep on layering on those colors. Try to use colors that look like they belong outdoors--such as your greens and blues and browns and oranges and that sort of thing.
Now that you have colored in everything using your colored pencils we can rush on ahead to
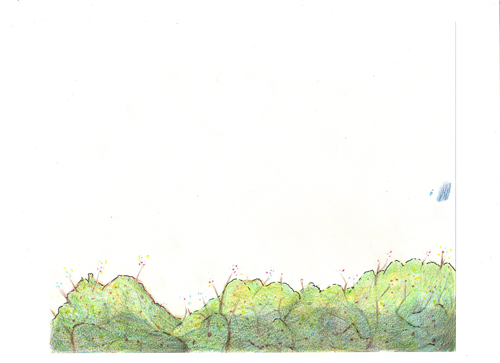
Step #3: Finish It All Off Using Pen And Ink To Give It Some Punch!
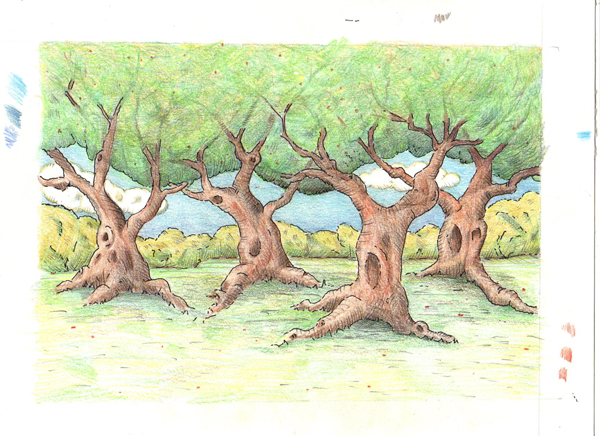
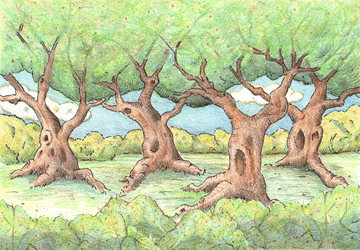
VIOLA!
Because of this simple 3 Easy Step plan this little thing only took me about three or four hours of actual drawing time! So, since I got nothin' better do do here in my Bumble Bee Gazette office, I decided to do a little shrubbery for the foreground.
I used the same simple 3 Easy Steps for my foreground shrubbery!
Step 1
Step 2
Step 3
Once the shrubbery was completed I laid it in front of my trees and I came up with this:

Well, there's no reason to draw a Bumble Bee Background and not stick a Wackobilly in it somewhere.
So I took the Moleet I drew up in my Wackobilly tutorial and stuck him in the picture like this:
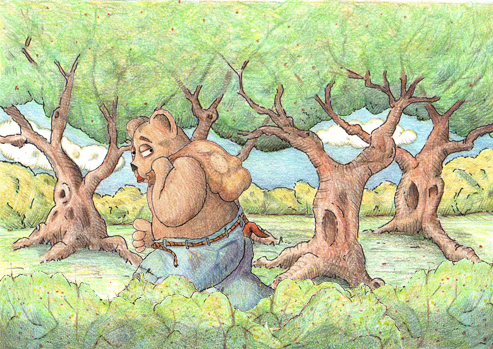
One, Two, Three, and there you be!
Like most, I am never satisfied with a thing if I can't cut corners and do it even easier. And so I pondered this whole 3 Step Business. And it occurred to me that I could do all this in just TWO STEPS!
That's right, folks! TWO STEPS!!!
So here is another bumble Bee Background in just TWO STEPS!!!
Step #1: Skip The Pen And Ink Opening And Go Straight For The Colored Pencils!
Like This!
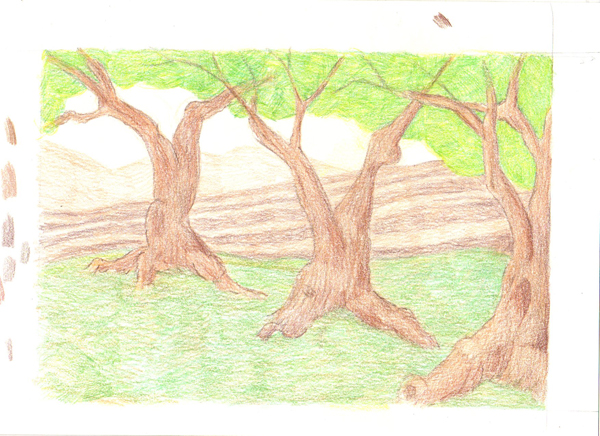
See? I skipped inking in the trees first and went right at it with the colored pencils!
Then I just kept on layering up the colored pencils until the thing looked like it was from out-of-doors.
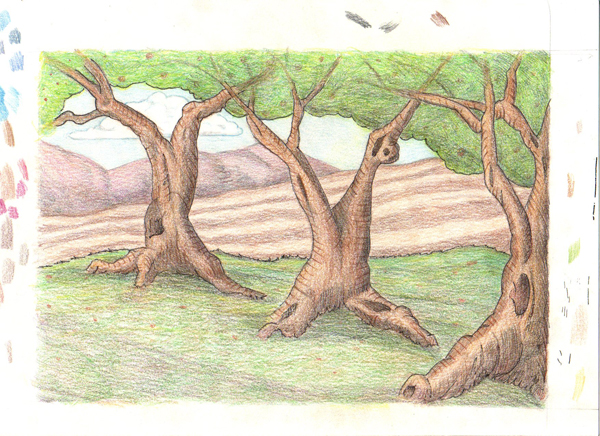
Finally, I went passed Go and did the new Step 2:
"Pen and Ink It!"
That was quite a breakthrough, but it didn't save me but a half an hour to forty five minutes, so I wondered if it were possible to do a Bumble Bee Background in just ONE STEP!
And you know what? You can!
YOU CAN DO IT ALL IN ONE GREAT BIG LONG EASY STEP!!!
STEP 1: "DO IT ALL IN COLORED PENCIL!"
And so folks here it is, a one step Bumble Bee Background! Done all in colored pencil in ONE easy-breezy, tad long step.
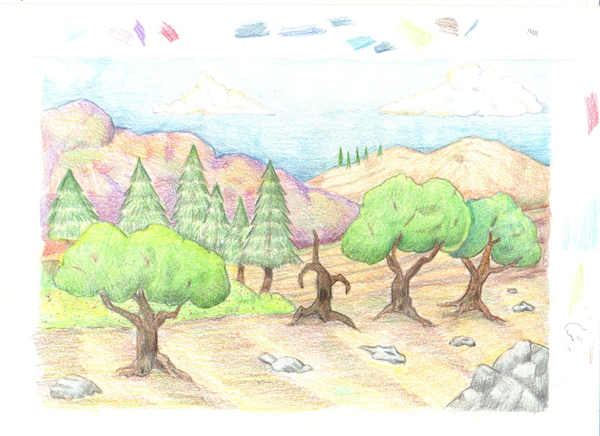
Now, folks I have to admit that this took about an or so longer than my Easy Two Step and Three Step Method, but it is just ONE STEP!!!
And that ought to count for somethin'!

|


